Paints used internally and externally in houses built in the 1950’s and 1960’s may have contained as much as 50% lead and this was reduced to about 1% by 1970. At the present moment, legislation introduced in December 1997, has reduced lead content in paint to 0.1% in some specialised paints and must be labelled if it contains more than 0.1%, so read the labels carefully. As a general rule of thumb, if your house was built prior to 1970, then it is highly likely that lead paint containing lead greater than 1% will be found in and/ or around the house. *

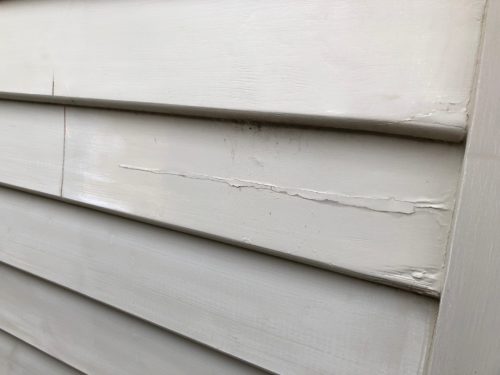
If we use a residential house as an example then you will find that paint containing lead, will generally be found on exterior timber surfaces like windows, fascia and weather boards and internally found on surfaces like walls and ceilings in kitchens, bathrooms, laundry and also skirting and doors. Lead paint would have been used in oil based undercoats like ‘Pink primer’ and ‘Red-lead primer‘ and in oil based top coats. You are at risk of lead exposure if the paint you are testing is flaking, chalking and damaged (chipped).
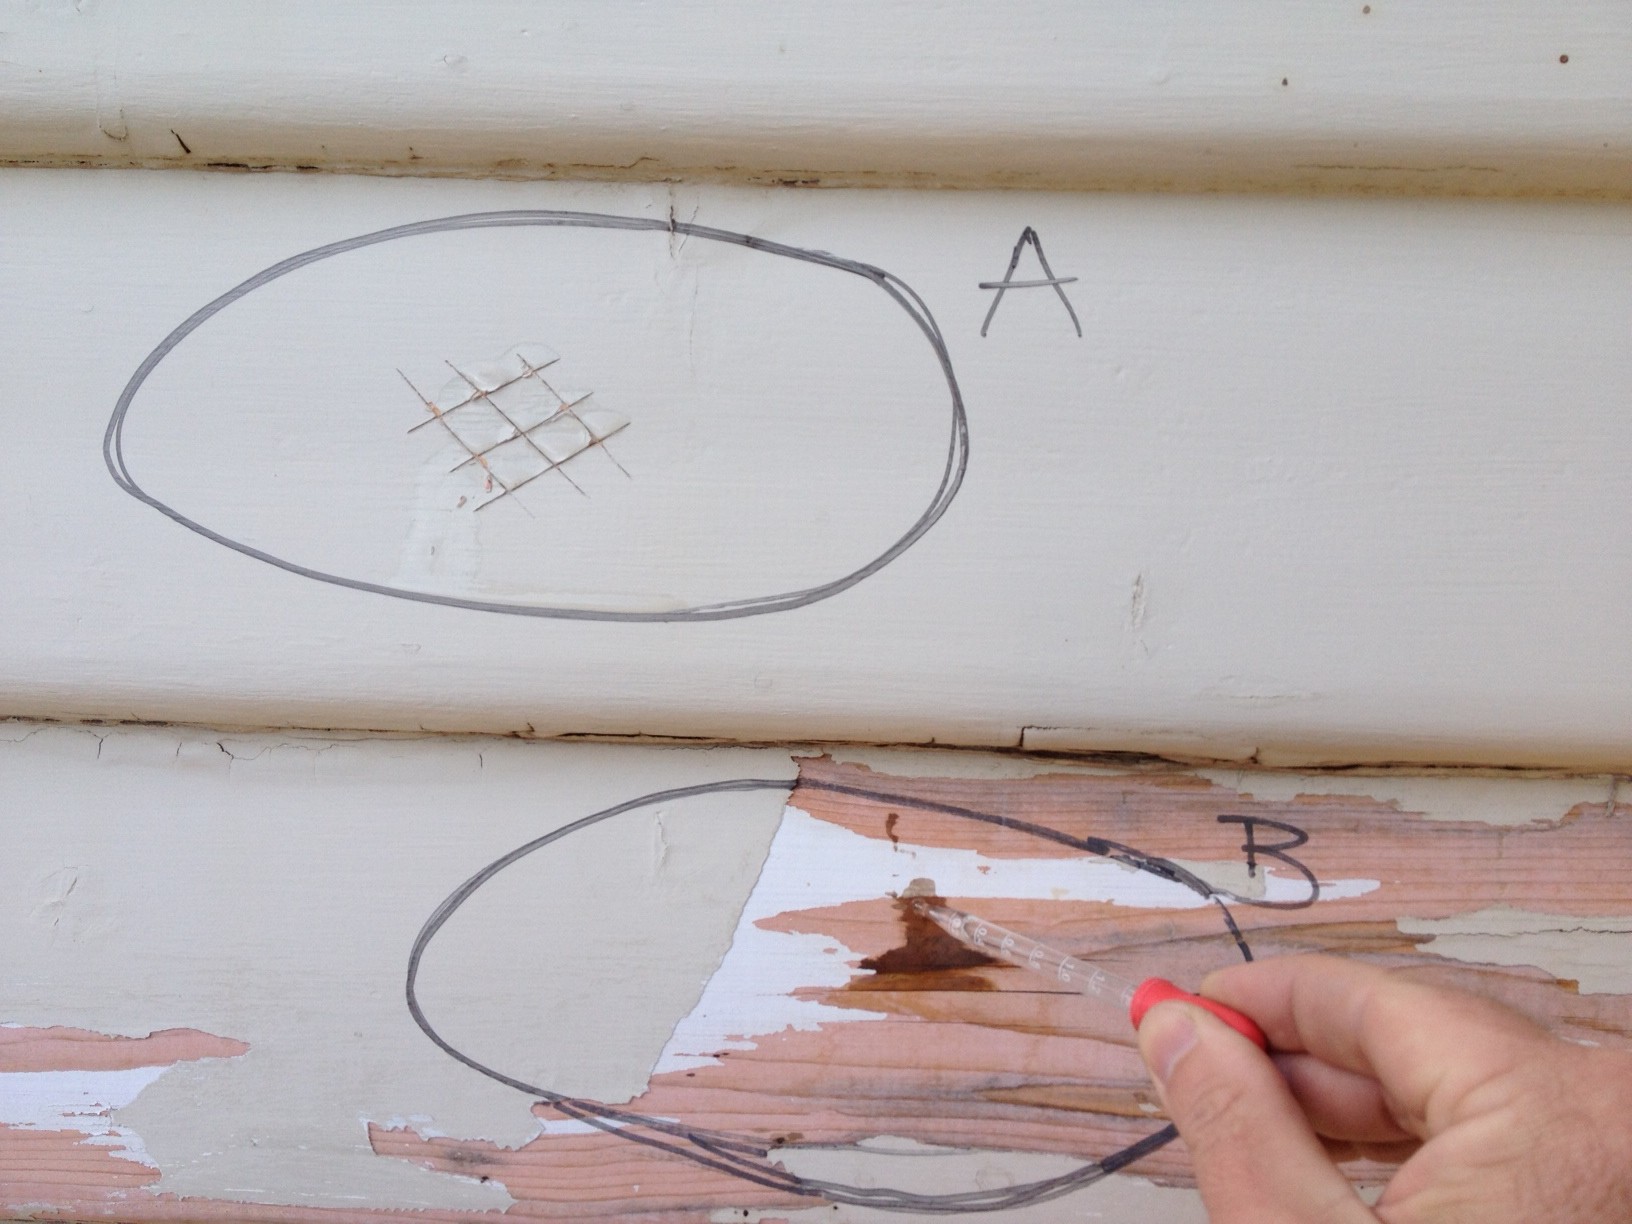
For the purpose of this article, I will discuss how to apply the Lead Test Kit to weather boards as shown in Pic 1 below. As you can see I have marked two areas with a circle and lets call them Site A and Site B. Site A is a relatively smooth and intact paint surface and Site B is a weathered and flaking surface exposing the weather board. The reason for this is that I want to show you how to apply the test kit to two different painted surfaces.

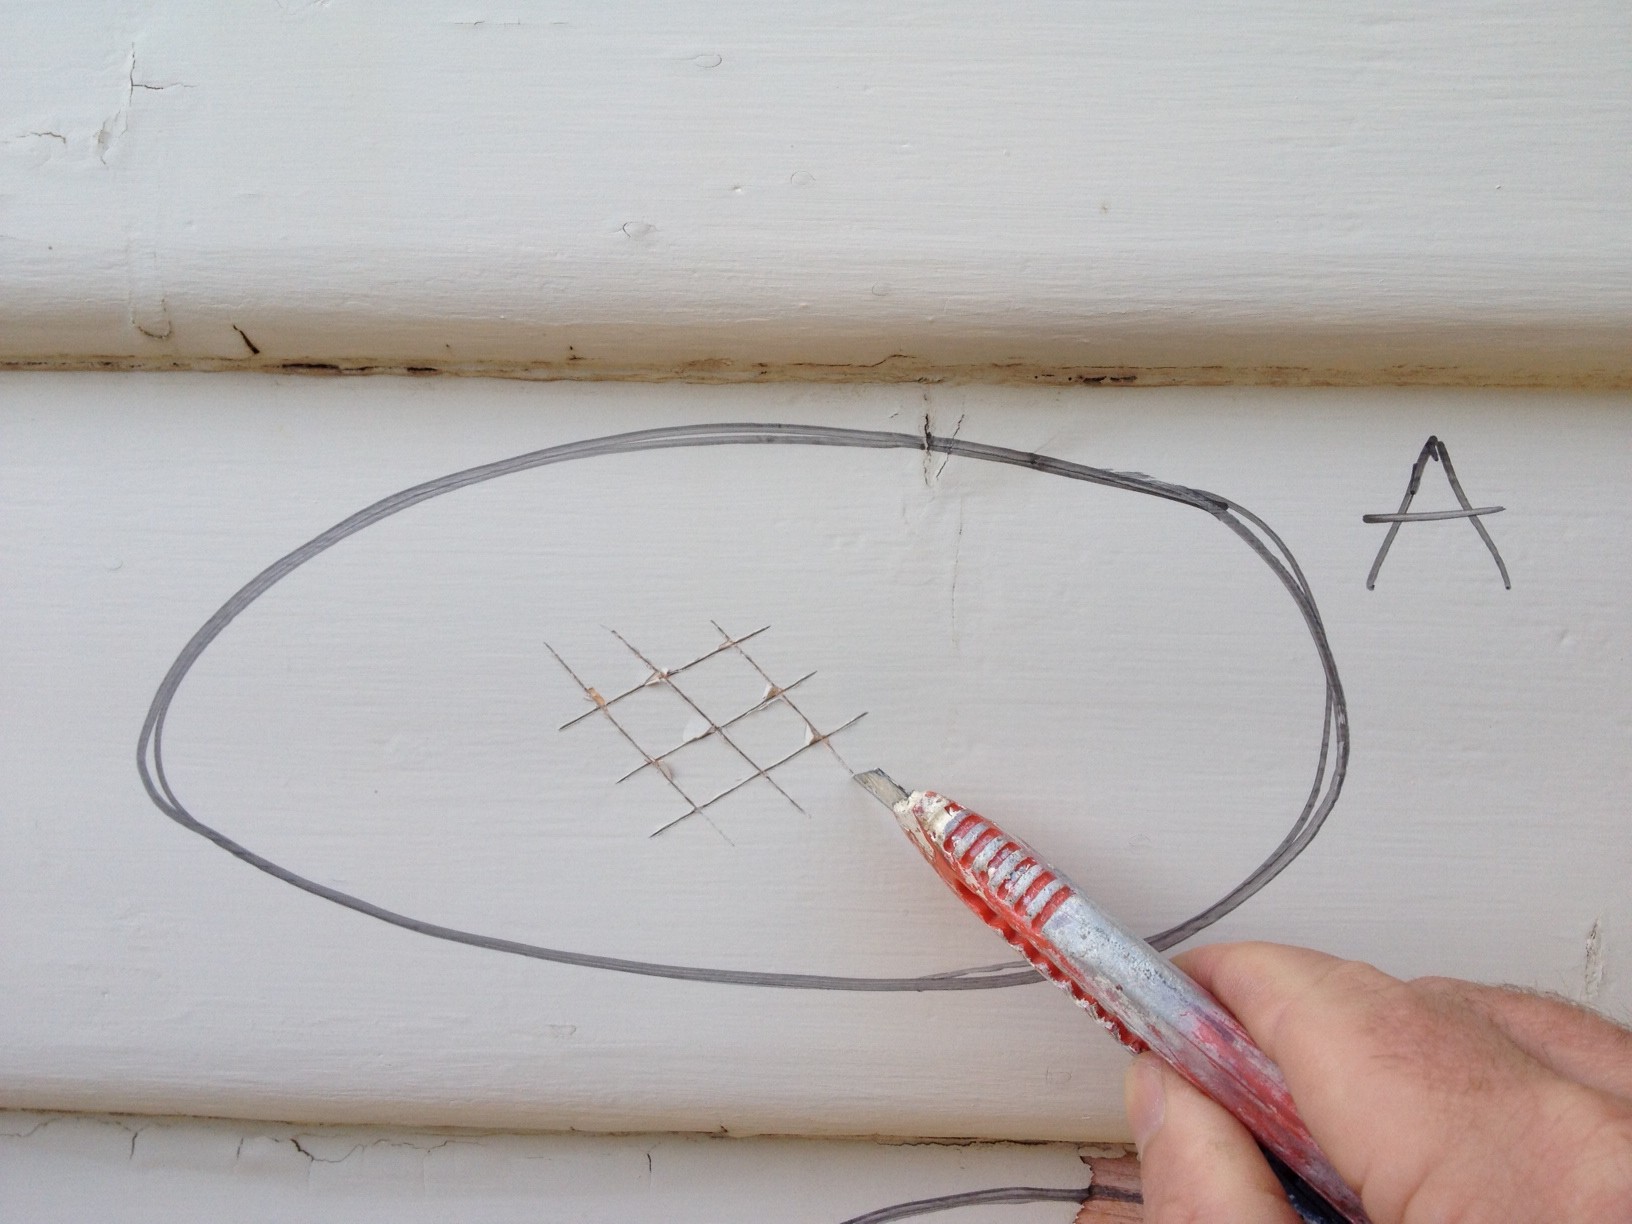
If we start with Site A, because the surface is of sound condition it is important to cut through the paint, using a stanley knife or razor blade, in order to expose the various layers to see if lead is present in any of the layers when the test solution is applied. With Site B, because the weather board is exposed we can apply the test solution directly to the weather board to see if any of the original undercoats may have contained any lead.
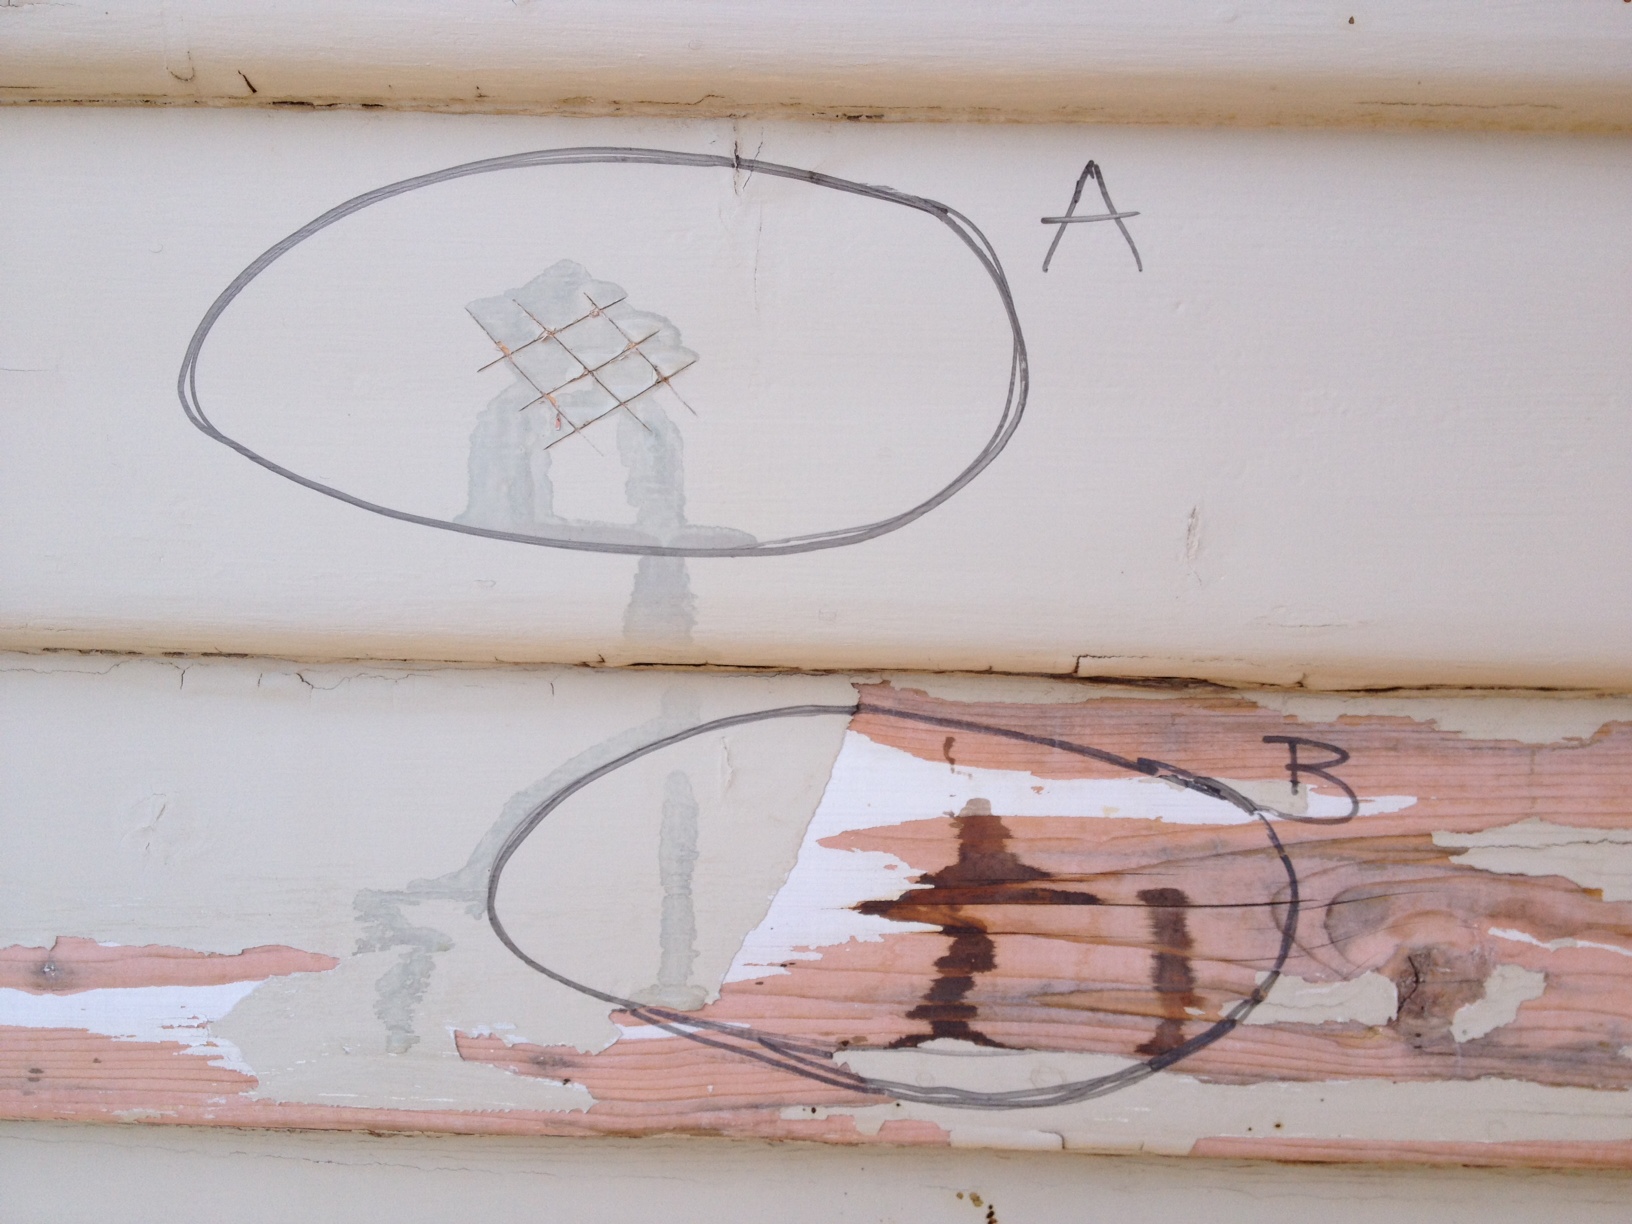
Having prepared the solution, which is a mixture of Sodium Sulphide Hydrated AR and water and using a small pipette, I placed some of the solution over Site A and Site B as shown below in Pic 3. With the test kit I am using the results will become visible within 10-20 seconds and depending on the colour of the reaction, it will determine if lead is contained in the painted surfaces. The test kit states that if we have A Positive Reaction then the painted surface or droplet will produce a dark brown or black colour. If we have A Negative Reaction then the painted surface will not change colour. Pic 4 shows us that there is some level of lead contained in the paint as Site A has a black reaction and Site B has a dark brown reaction.
If your test results for lead are positive, then it is strongly advised to contact a painter who is accredited in the implementation of Safe Lead Paint work practices and management to discuss the options available to you in completing your painting project. Some of these option include:
- Do nothing, if the paint is in sound and good condition and is not likely to be damaged by general wear and tear, but it will need to be inspected regularly.
- Cover the paint containing lead, if the preparation is minimal and it produces little lead dust and contaminated waste. The downside is that the paint will still contain lead.
- Remove painted items and replace with new, often the easiest, fast and safe option especially for curved surfaces. Downside is it can be expensive to match existing items.
- Chemical stripping, produces little dust and is very efficient. The chemical strippers available in the market are environmentally friendly and safe to use indoors. Keep in mind to dispose of the waste safely.
- Sanding with a HEPA vacuum, very fast and produces little dust. Ideal for flat surfaces rather than curved. Must be done by a qualified painting contractor.
- Wet scraping/ Wet sanding, relatively inexpensive but takes a lot of time. Downside is it could damage undelying plaster and timber surfaces. **
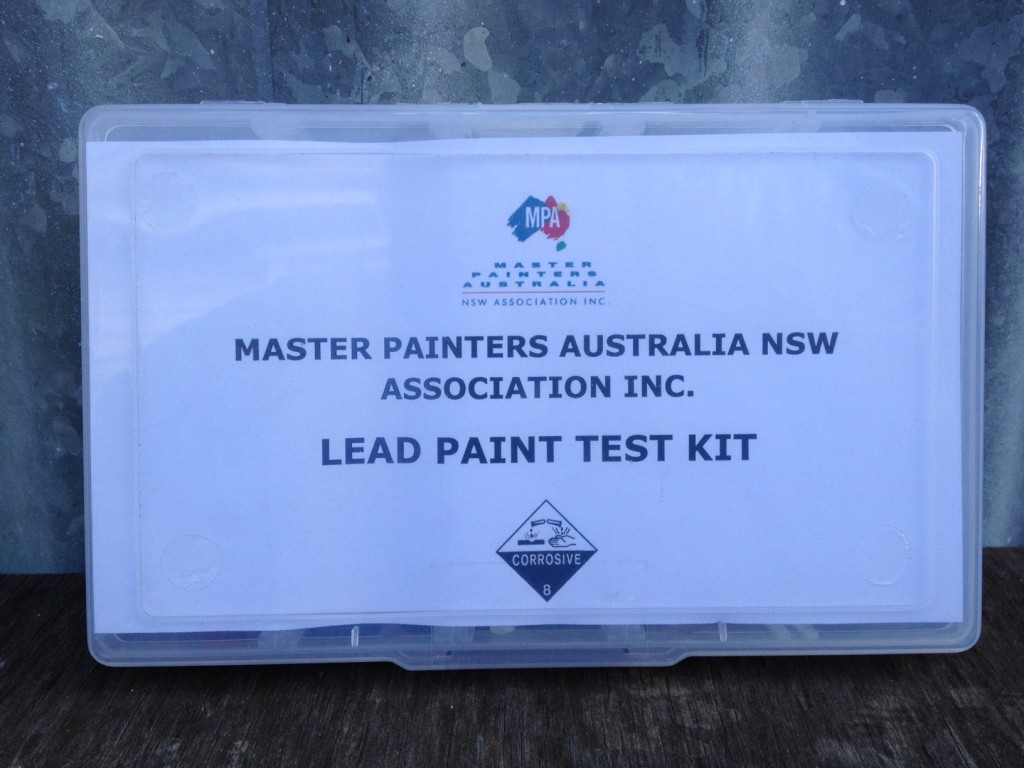
It is important to note that the process for testing lead in painted surfaces as mentioned above is only applicable for the test kit displayed and used for this demonstration. Most kits available follow a similar process where the outcome of the test is determined by a specific reaction to that particular product. If you decide to test for lead on any of your surfaces and you have purchased a test kit from either a hardware or paint store, then it is important that you follow that manufacturers guidelines to determine whether lead is present.
* & ** ….. ‘The Six Step Guide to Painting your Home, Lead Alert’, Third Edition 2009, Australian Government.